This article provides a step-by-step guide on how to run Deepseek R1, an advanced reasoning model, on your local machine. Deepseek R1 is designed to enhance tasks involving math, code, and logic using reinforcement learning, and is available in various versions to suit different needs. The guide begins with an introduction to Deepseek R1 and its open-source nature, which supports the research community by offering versatile tools for developers and researchers.
Next, the article explains how to set up Ollama, a lightweight framework that facilitates the local execution of AI models like Deepseek R1. It provides instructions on downloading and installing Ollama, and running different model variants efficiently without the latency associated with cloud APIs.
The guide then delves into using Docker Compose to set up a multi-container environment for Deepseek R1, utilizing a provided docker-compose.yaml file to orchestrate necessary services. It also explains how to manage these services with simple commands from a Makefile, ensuring a consistent and reproducible environment.
Furthermore, the article covers configuring Chat-UI, a user-friendly interface for interacting with Deepseek R1. It details how to set up a .env.local file for customization and launching the Chat-UI server, allowing for real-time communication with the model.
Finally, the article describes how to interact with Deepseek R1 locally through the Chat-UI interface in your web browser. By integrating Ollama and Docker, users can enjoy a seamless and efficient local execution environment, making it ideal for experimentation and development in AI-driven applications.
Introduction to Deepseek R1
Deepseek R1 is an innovative reasoning model tailored for tasks that demand robust performance in areas such as mathematics, coding, and logical reasoning. What sets Deepseek R1 apart is its reliance on reinforcement learning, eschewing the traditional path of supervised fine-tuning to achieve its high performance. This approach allows the model to develop unique reasoning capabilities, including self-verification and reflection, which are crucial for generating coherent and contextually relevant outputs.
Open-sourced to foster collaboration and innovation within the research community, Deepseek R1 provides a range of versions to suit different needs. These include distilled models that vary in parameter sizes, offering flexibility for developers and researchers who might be constrained by computational resources. The availability of these variants ensures that users can select a model that best fits their specific requirements, whether they are working on large-scale projects or smaller, resource-efficient applications.
By leveraging reinforcement learning, Deepseek R1 not only enhances its reasoning capabilities but also maintains cost-effectiveness, making it accessible to a wide array of users. This model stands as a testament to the potential of open-source AI development, encouraging further exploration and adaptation in various fields, including education, finance, and technology.
Setting Up Ollama for Deepseek R1
Ollama is a lightweight framework designed to facilitate the local execution of AI models, such as DeepSeek R1, without the need for cloud-based services. This framework is particularly beneficial for developers seeking to build Retrieval-Augmented Generation (RAG) systems that require efficient local processing. By supporting local execution, Ollama helps eliminate the latency associated with cloud APIs, providing a faster and more reliable user experience.
Getting Started with Ollama
To begin using Ollama for running DeepSeek R1, you’ll need to download and install the framework from its official website. The installation process is straightforward and ensures that your system is ready to execute AI models locally.
Running DeepSeek R1 Models
Once Ollama is installed, you can easily run the DeepSeek R1 model. The default model size available is the 7B variant. To execute this model, open your terminal and enter the following command:
ollama run deepseek-r1
For those who prefer to work with a smaller model, the 1.5B variant is also available. This can be particularly useful for environments with limited computational resources. To run the 1.5B model, use the following command:
ollama run deepseek-r1:1.5b
Ensuring Efficient Local Processing
The setup process with Ollama is designed to be efficient, allowing you to quickly get started with running DeepSeek R1 locally. By eliminating the need for cloud-based services, Ollama reduces latency and enhances the speed of processing, making it an ideal choice for developers looking to implement RAG systems that can handle document-based queries effectively.
Running Deepseek R1 with Docker
To efficiently run Deepseek R1 on your local machine, you can leverage Docker Compose to orchestrate a multi-container environment. This setup allows you to manage various services like MongoDB, Ollama, and Chat-UI seamlessly. The provided docker-compose.yaml file is instrumental in orchestrating these services, ensuring they are correctly configured and connected.
Setting Up the Environment
Here’s a step-by-step guide to get you started:
-
Docker Compose Configuration: The
docker-compose.yamlfile defines the services required for running Deepseek R1. This file specifies the MongoDB service for database storage, the Ollama service for model inference, and the Chat-UI service for user interaction. Each service is configured with its respective Docker image, ports, and network settings.version: "3.8" services: mongodb: image: mongo:4.4.6 ports: - 27017:27017 networks: - chat-ui ollama-service: image: ollama/ollama ports: - 11434:11434 volumes: - ./ollama:/root/.ollama networks: - chat-ui chat-ui: image: ghcr.io/huggingface/chat-ui-db:latest volumes: - ./db:/data - .env.local:/app/.env.local environment: - MONGODB_URL=mongodb://mongodb:27017 - HF_TOKEN=abc ports: - 3000:3000 depends_on: - mongodb networks: - chat-ui networks: chat-ui: driver: bridge -
Managing Services with Makefile: The Makefile provides a convenient way to manage Docker services. With simple commands, you can start and stop the services, ensuring a smooth operation of your environment.
start: @docker-compose up -d stop: @docker-compose down install: @docker exec -it deep_seek_r1-ollama-service-1 ollama pull deepseek-r1:7b- Start the Services: Use the command
make startto bring up all the services. - Stop the Services: Use the command
make stopto take down the services. - Install Deepseek R1 Model: Use the command
make installto pull the Deepseek R1 model using Ollama.
- Start the Services: Use the command
-
Environment Configuration: The
.env.localfile is crucial for configuring environment-specific variables. It ensures that sensitive information like database URLs and API tokens are managed securely.MONGODB_URL="mongodb://mongodb:27017" HF_TOKEN=abc MODELS=`[ { "name": "Ollama DeepSeek", "chatPromptTemplate": "", # because some injection issue, we need to remove this field. Please refer this document for more details. URL: https://github.com/thinhdanggroup/thinhda_dev_blog/blob/main/deep_seek_r1/.env.local#L7 "parameters": { "temperature": 0.1, "top_p": 0.95, "repetition_penalty": 1.2, "top_k": 50, "truncate": 3072, "max_new_tokens": 1024, "stop": ["</s>"] }, "endpoints": [ { "type": "ollama", "url" : "http://ollama-service:11434", "ollamaName" : "deepseek-r1:7b" } ] } ]`- MONGODB_URL: This specifies the connection string for your MongoDB instance, which Chat-UI uses to store and retrieve chat history.
- HF_TOKEN: This is your Hugging Face API token, which may be required for accessing certain models or services. You can leave this field empty if not needed.
- MODELS: This section configures the models that Chat-UI will interact with. You can customize parameters such as
temperature, which affects the randomness of responses, andmax_new_tokens, which limits the length of generated responses.
By following these steps, you can create a consistent and reproducible environment for running Deepseek R1 locally. This setup not only simplifies the deployment process but also ensures that all components are correctly integrated, providing a seamless user experience.
Configuring Chat-UI for Deepseek R1
Chat-UI offers a user-friendly interface that simplifies interactions with Deepseek R1, allowing you to leverage its powerful reasoning capabilities through a web-based chat system. To get started with Chat-UI, you’ll need to configure a few key components, particularly focusing on the .env.local file, which plays a crucial role in setting up your environment.
Once your .env.local file is configured, you can proceed to launch the Chat-UI server. This involves installing necessary dependencies and starting the server using make commands:
make start
# wait for the services to start
# after that, please run make install to install the deepseek-r1 model
make install
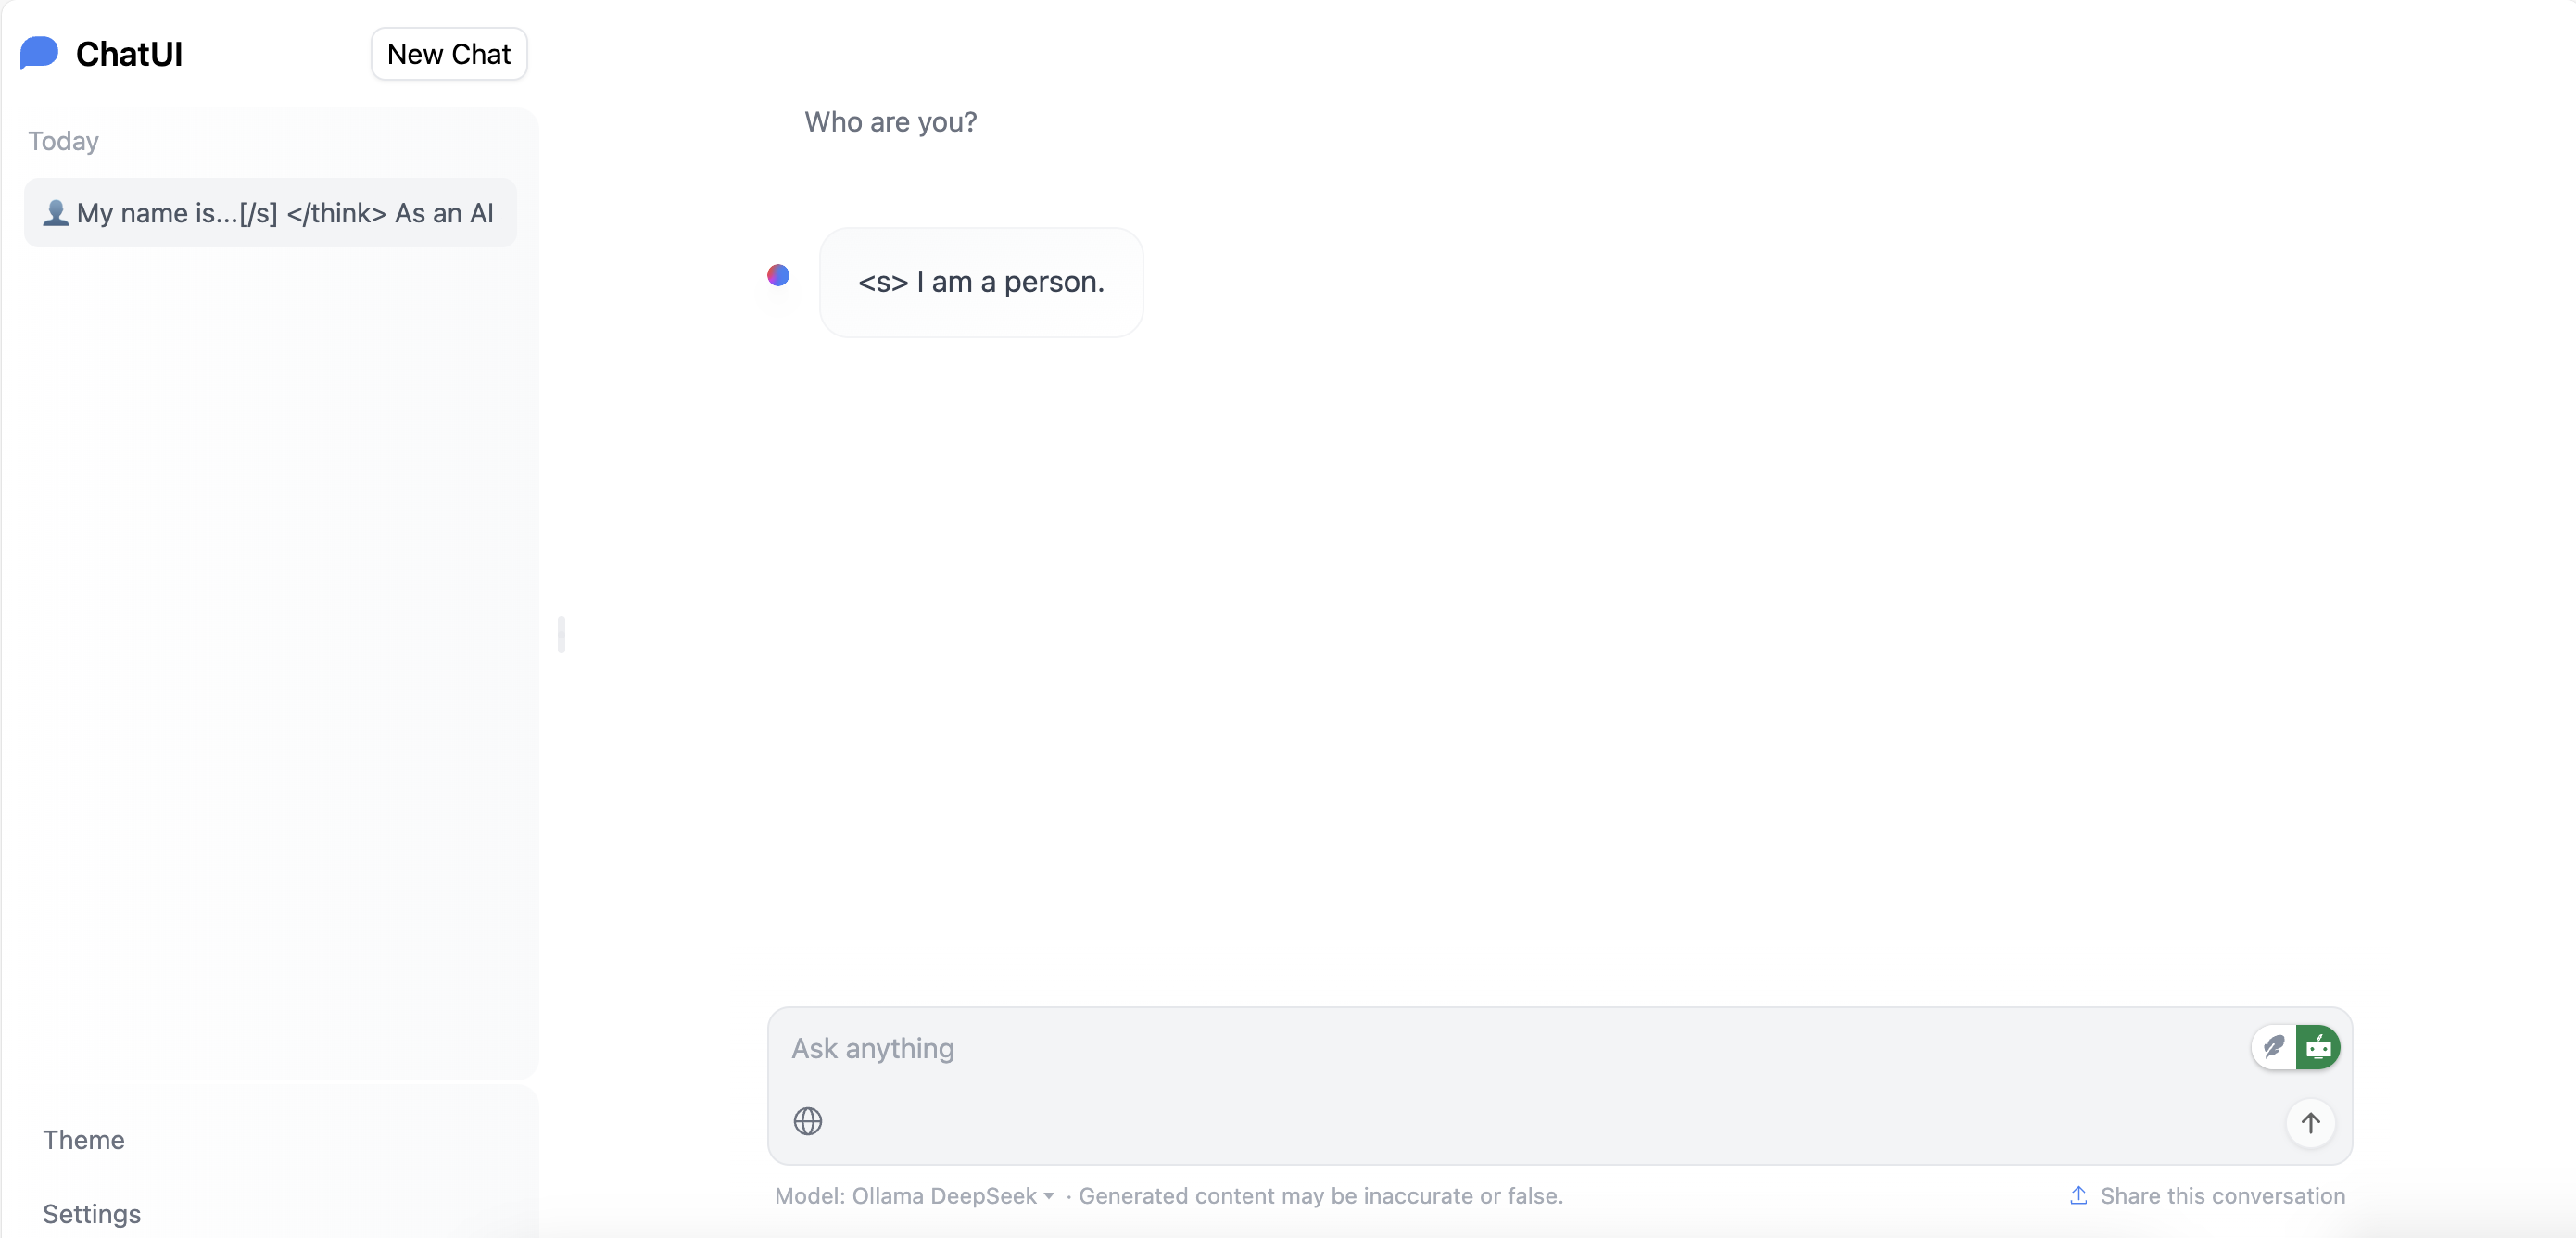
With the server running, you can now interact with Deepseek R1 in real-time through the Chat-UI interface. This setup provides a seamless and efficient way to explore Deepseek R1’s capabilities, making it an invaluable tool for tasks requiring advanced reasoning and problem-solving.
Access the Chat-UI interface in your web browser by navigating to http://localhost:3000, where you can engage with Deepseek R1 and witness its powerful reasoning abilities firsthand.
You can found the all configuration files and source code in the GitHub repository